|
 Open the graphical creation tool The database creation tool can be run with newsaadadb script (add .bat for windows) Open the graphical creation tool The database creation tool can be run with newsaadadb script (add .bat for windows)
%cd SAADA_HOME/bin

% ./newsaadadb
|
or by invoking the ant task (see)
%cd SAADA_HOME/bin

% ./sant saadadb.new
|
SAADA_HOME Refers to the installation directory of Saada. Don’t get confused with SAADA_DB_HOME which refers to the future SaadaDB installation directory
 Step 1 Step 1
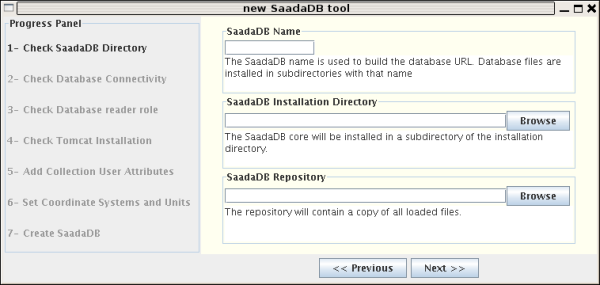
- SaadaDB Name : The name of the SaadaDB must start with a letter and it must contain non accentued letters, digits and `_. This name will be used in URLs or in directory names.
- Installation directory : All Saada stuff (java, scripts,.....) is copied in a subdirectory of the install directory with the SaadaDB name. Saada operator must have write permission in this directory.
- Repository : All loaded datafiles are copied in subdirectories of the repository. The root subdirectory has the same name as the SaadaDB. Saada operator must have write permission in this directory.
 Step 2 Step 2
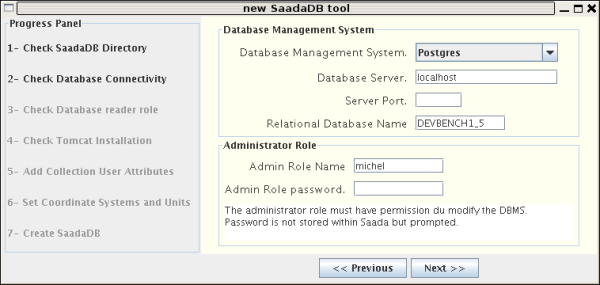
- Database Management System : Only Postgres is supported by Saada until 1.5.0. Saada supports MySQL from 1.5.1.
- Database Server : Hostname of the machine running the Postgres server. localhost means that the server is running on the local host.
- Server Port : Socket port number used by the server. Postgres uses port 5432 by default. The port must only be specified if the server runs on a remote host through another port than 5432.
- Relational Database Name : The name of the relational database managed by the SaadaDB can differ from this of the SaadaDB. Avoid as much as possible to use this feature.
- Admin Role Name : That is the postgres role (or account see) used by the dataloader. It must have the Postgres superuser privilege.
- Admin Role Password : This sensible password is not stored within the system. It is just pormpted here to check the database configuration.
 Step 3 Step 3
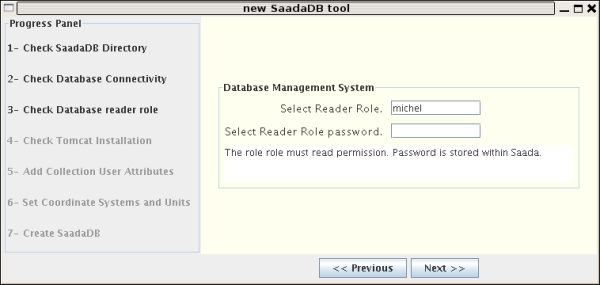
- Reader Role : Postgres role (or account see) used by the Web server to access data. This role must only have read permission.
- Reader Password : This password is stored within the system. Avoid to use the same role for both admin and reader.
 Step 4 Step 4
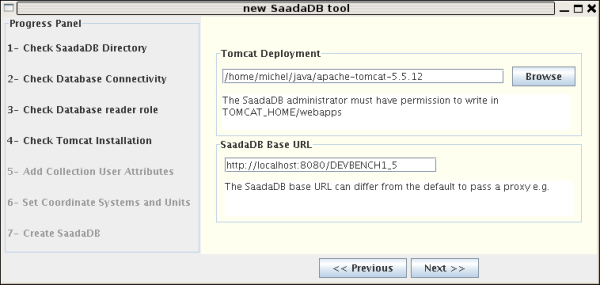
- Tomcat Deployment : Installation directory of the Tomcat server. This location is used by the Saada deployment facility.
- SaadaDB base URL Filling properly this field is very important for running the Web interface.
- If you get directly access to your SaadaDB on your Tomcat instance, put http://your_host:8080/SAADA_DB_NAME. We assume here that your Tomcat used the port 8080 and that your SaadaDB is named SAADA_DB_NAME.
- If you get access to your Tomcat instance through a proxy, type the proxy address.
 Step 5 Step 5
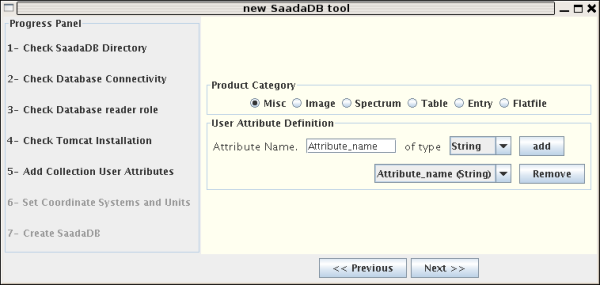
- Attributes (keywords or columns according to your programming backgroung) can be added at collection level. The Saada datamodel provides some attributes (position, name...) reported at collection level in order to be defined for all data recorded within the database. These collection attributes are either computed by Saada or populated with values reported from native keywords. User collection attributes are managed exactly as other collection attributes. They MUST be defined at creation time (after is too late). User collection attributes are defined for one category.
Attribute name must begin with a letter and only contain digits, letters and ’_’.
 Step 6 Step 6
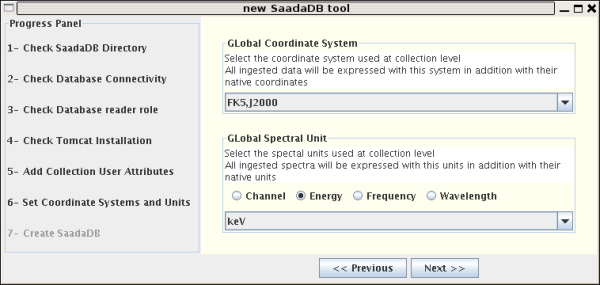
- Global Coordinate System : In order to speed up spatial search, the coordinate of all ingested data are converted in a system global for the whole SaadaDB. Note that orginal coordinate are kept. Converted coordinates are reported at collection level.
- Global Spectral Units : Spectral range of ingested spectra are converted in a global system (as much as possible). Orginal values are kept in data table. Converted values are reported at collection level.
 Step 7 Step 7
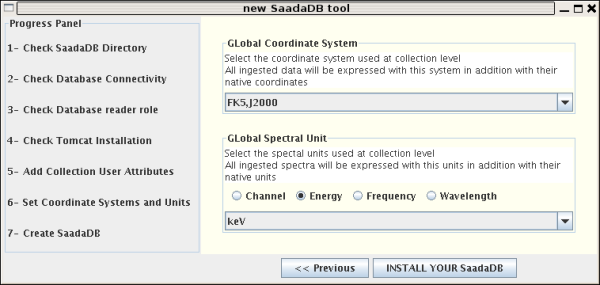 . .
- At this level click on Install your SaadaDB. The installation process achieve the following steps :
- Install the SaadaDB
- Create the Postgres database
- Patch and compile java code
- Build servlets
last update 2009-03-18
|


